Welcome, home improvers!
Are you struggling with the installation of your Bio Bidet 6800?
Tired of confusing instructions.
Hey, we feel ya!
It’s not always a walk in the park, right?
But guess what?
We’ve got your back!
We’ve got this handy guide to help you install your Bio Bidet 6800 without breaking a sweat.
No fancy jargon, no complex procedures.
Just easy-to-follow steps.
So, let’s gear up and get ready for some plumbing action.
Be prepared to learn about gathering your tools, shutting off the water, swapping out hoses, and more.
And remember, there’s no rush.
We’ll take it slow and steady.
Gathering the Necessary Tools
Before we dive into the nitty-gritty of bidet installation, let’s make sure we have all the tools at our disposal.
After all, a craftsman is only as good as his tools, right?
So, here’s what you’ll need:
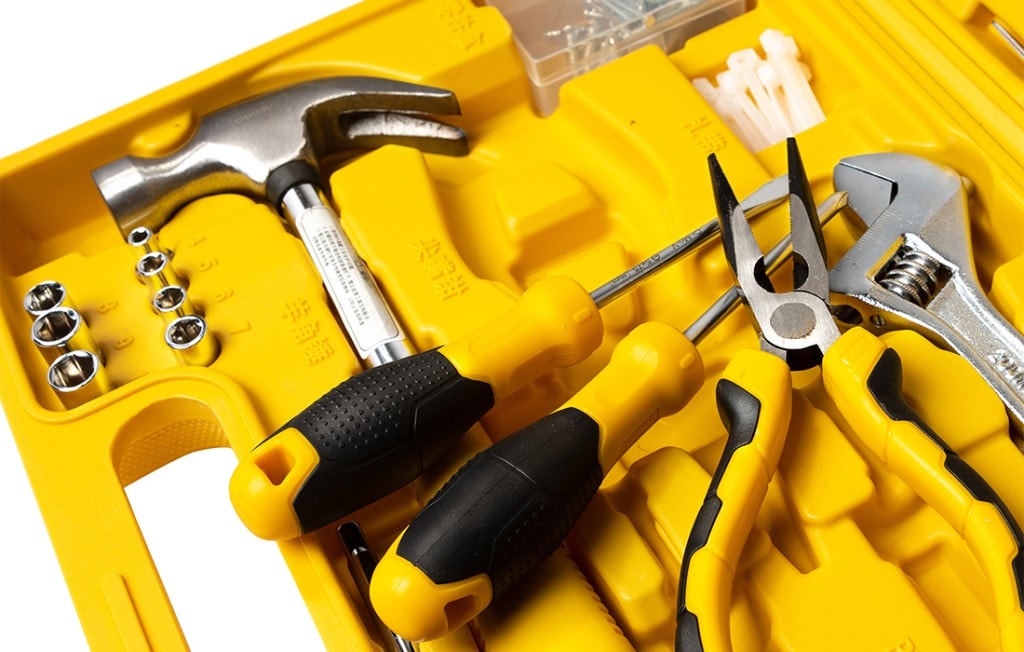
- Adjustable wrench: This will be your best friend during the installation process. It’s versatile and will help you tighten and loosen various nuts and bolts.
- Screwdriver: A simple flat-head or Phillips-head should do the trick. This will come in handy when attaching the bidet seat to the toilet.
- Teflon Tape: This is used to ensure a watertight seal on your plumbing connections. Remember, we don’t want any leaks!
- Plumber’s Putty: This will help seal the deal (literally!) and ensure a leak-free installation.
- Bucket & Towels: For any water that might escape during the process.
Better safe than sorry!
Now that we have our toolkit ready, let’s move on to the next step.
Shutting Off the Water and Draining the Toilet
let’s start by shutting off the water supply.
- Locate the Water Supply Valve: You’ll find this little guy on the wall behind your toilet. It’s usually a round or oval knob made of plastic or metal.
- Turn Off the Water: Now, give that knob a good clockwise turn until it won’t budge. This will cut off the water supply to your toilet.
- Flush the Toilet: With the water supply off, hit the flush lever on your toilet. This will drain the water from the toilet tank. You might need to do this a couple of times to make sure it’s completely drained.
- Empty the Bowl: Some water will still remain in the toilet bowl.
Don’t worry, we’ve got a fix for that too!
Simply take a cup or small bucket, scoop out the water, and dump it into a bucket or sink.
And voila!
You’ve successfully shut off the water and drained your toilet.
Give yourself a pat on the back!
But don’t get too comfortable yet.
We’ve still got a long way to go.
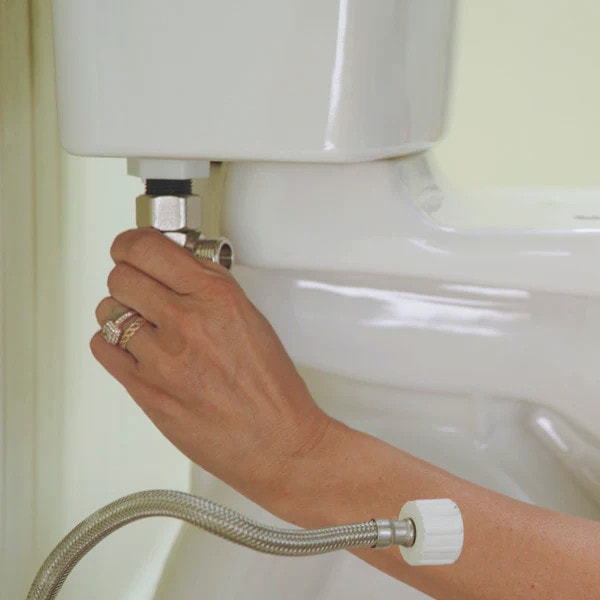
Removing the Existing Water Supply Hose
Alright, DIYers!
Now that we’ve successfully shut off the water and drained the toilet, it’s time to remove the existing water supply hose.
- Locate the Water Supply Hose: This is the flexible tube that connects your toilet tank to the water supply valve. It’s usually made of stainless steel or plastic.
- Loosen the Connection: Using your trusty adjustable wrench, gently loosen the connection between the water supply hose and the toilet tank.
- Detach the Hose: Once the connection is loose, you should be able to unscrew it by hand. Be careful not to pull or yank the hose, as this could damage the threads.
- Drain the Hose: There might be some water left in the hose. Hold it over a bucket or towel and allow any remaining water to drain out.
- Remove the Hose from the Valve: Now, repeat the process to detach the other end of the hose from the water supply valve. Again, use your wrench to loosen the connection, then unscrew it by hand.
Attaching the T-Valve to the Toilet Tank
Now that we’ve removed the existing water supply hose, it’s time to attach the T-Valve to the toilet tank.
This is a crucial step in our Bio Bidet 6800 installation process.
So, let’s get to it! 🚽💦
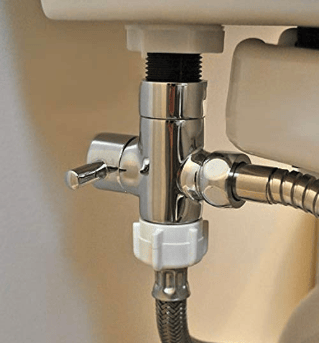
- Locate the T-Valve: This is a special valve that comes with your Bio Bidet 6800. It’s designed to split the water supply between your toilet tank and your new bidet.
- Attach the T-Valve to the Toilet Tank: Take the T-Valve and screw it onto the fill valve at the bottom of your toilet tank. Use your hands to tighten it as much as you can.
- Ensure a Secure Connection: Once you’ve tightened the T-Valve by hand, use your adjustable wrench to give it a final tighten. But be careful not to over-tighten as this could damage the threads.
- Check for Leaks: After you’ve attached the T-Valve, check for any potential leaks. If you notice any water dripping, tighten the connection a bit more until the leak stops.
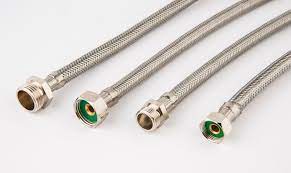
Checking for Alternate Water Supply Hose (Non-USA)
This step is particularly important for our friends outside the USA, as the standard hose might not fit your local plumbing fixtures.
- Check Your Local Plumbing Standards: Plumbing fixtures can vary greatly from country to country. So, it’s crucial to check your local plumbing standards before proceeding. This will ensure that your Bio Bidet 6800 fits perfectly with your existing plumbing.
- Identify the Type of Hose Needed: Depending on your local plumbing standards, you might need a different type of water supply hose. This could be a different size, material, or type of connection.
So, make sure to identify the type of hose needed for your specific situation.
- Purchase the Alternate Hose: Once you’ve identified the type of hose needed, it’s time to purchase it. You can usually find these at your local hardware store or online. Remember, it’s always better to have the right tools for the job!
- Replace the Standard Hose with the Alternate Hose: Now, replace the standard water supply hose that came with your Bio Bidet 6800 with the alternate hose.
Follow the same steps as before, but with the new hose.
Connecting the Water Supply Hose to the T-Valve
Now that we’ve attached the T-Valve and checked for an alternate water supply hose, it’s time to connect the water supply hose to the T-Valve.
- Locate the Water Supply Hose: This is the flexible tube that we removed earlier. It’s usually made of stainless steel or plastic, depending on your local plumbing standards.
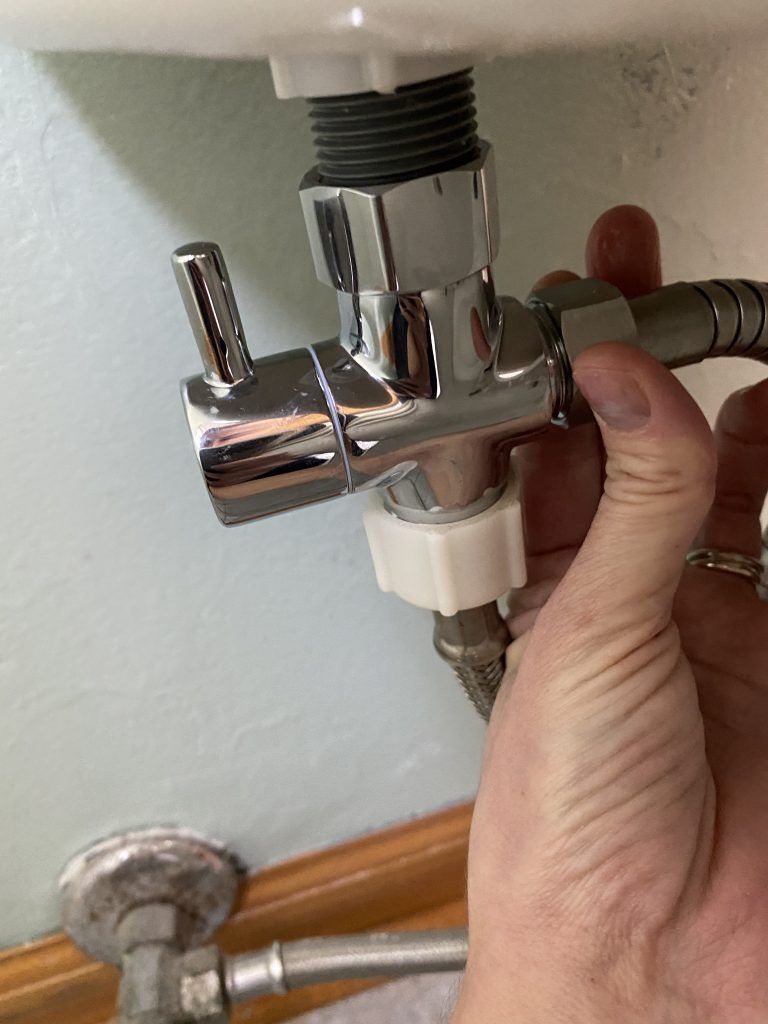
- Connect the Hose to the T-Valve: Take the water supply hose and screw it onto the free end of the T-Valve attached to your toilet tank. Use your hands to tighten it as much as you can.
- Ensure a Secure Connection: Once you’ve tightened the hose by hand, use your adjustable wrench to give it a final tighten. But be careful not to over-tighten as this could damage the threads.
- Check for Leaks: After you’ve connected the water supply hose to the T-Valve, check for any potential leaks. If you notice any water dripping, tighten the connection a bit more until the leak stops.
Removing the Existing Toilet Seat
Now that we’ve connected the water supply hose to the T-Valve, it’s time to remove the existing toilet seat.
This is a crucial step in our Bio Bidet 6800 installation process.
So, let’s get to it! 🚽💦
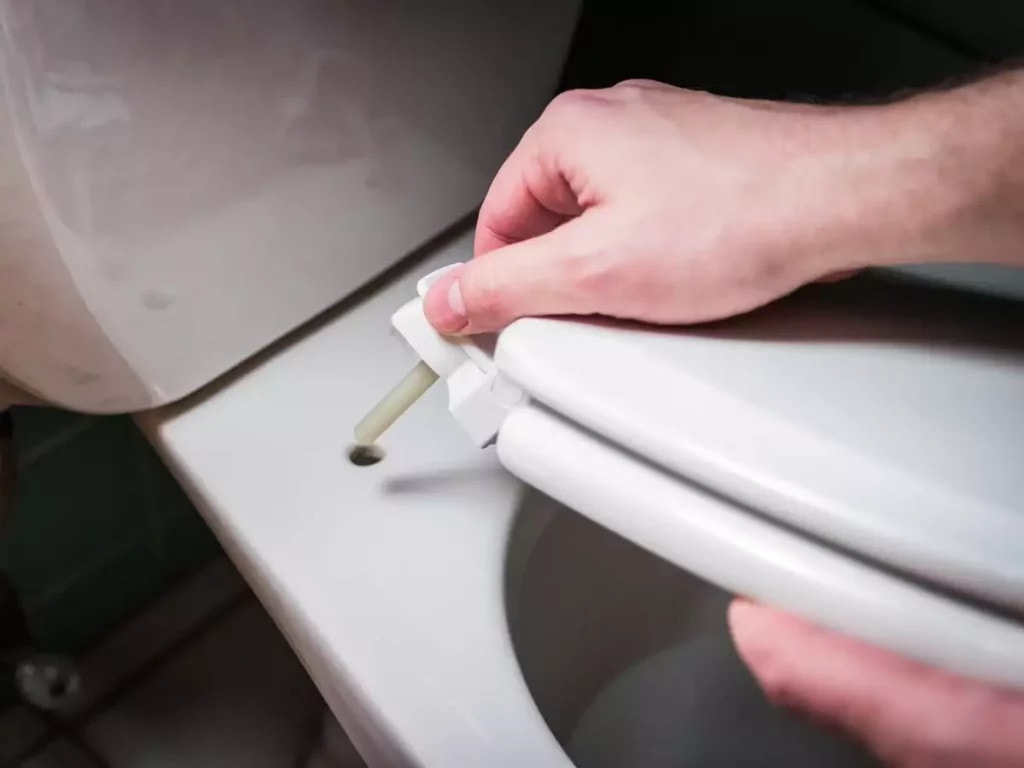
- Locate the Toilet Seat Bolts: These are usually found at the back of the toilet seat, connecting it to the toilet bowl. They might be covered by plastic caps for aesthetic purposes. If so, simply pop these caps open to reveal the bolts.
- Loosen the Bolts: Using your trusty screwdriver, turn the bolts counterclockwise to loosen them.
- Remove the Toilet Seat: Once the bolts are loose, you should be able to lift the toilet seat right off. Be careful not to scratch or damage the toilet bowl in the process. You’ve successfully removed the existing toilet seat.
Placing and Aligning the Mounting Bracket
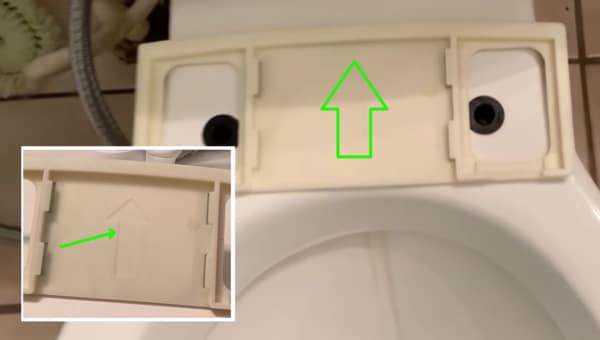
- Locate the Mounting Bracket: This is a special piece that comes with your Bio Bidet 6800. It’s designed to secure your new bidet seat to the toilet bowl.
- Place the Bracket on the Toilet Bowl: Position the mounting bracket over the bolt holes on your toilet bowl. Make sure the arrow on the bracket is pointing towards the front of the toilet.
- Align the Bracket: The mounting bracket has adjustable sliders that allow you to align it perfectly with the bolt holes on your toilet bowl. Slide the bracket until the holes line up.
- Secure the Bracket: Once the bracket is aligned, insert the provided bolts through the holes in the bracket and into the toilet bowl. Tighten the nuts onto the bolts to secure the bracket in place.
Mounting the Bidet Seat
Alright, folks!
This is a crucial step in our Bio Bidet 6800 installation process.
So, let’s get to it! 🚽💦
- Locate the Bidet Seat: This is the main part of your Bio Bidet 6800. It’s designed to provide you with a comfortable and hygienic bathroom experience.
- Align the Bidet Seat with the Bracket: Position the bidet seat over the mounting bracket. You’ll notice two guiding tracks on the bracket that align with the grooves on the bottom of the bidet seat.
- Slide the Bidet Seat onto the Bracket: Once the bidet seat is aligned with the bracket, slide it all the way back until it clicks into place. You should hear a soft click sound, indicating that the seat is securely attached to the bracket.
- Check the Seat Alignment: After mounting the bidet seat, check to make sure it’s properly aligned with the toilet bowl. The seat should be centered on the bowl with no overhang on either side.
Connecting the Bidet Hose
- Locate the Bidet Hose: This is the flexible tube that comes with your Bio Bidet 6800 It’s designed to connect your bidet seat to the T-Valve, allowing water to flow into the bidet when needed.
- Connect the Hose to the Bidet Seat: On the side of your bidet seat, you’ll find a small inlet marked ‘IN’. This is where you’ll connect one end of the bidet hose. Simply screw it in by hand, turning clockwise.
- Connect the Hose to the T-Valve: Now, take the other end of the bidet hose and connect it to the free end of the T-Valve. Again, screw it in by hand, turning clockwise.
- Ensure a Secure Connection: Once you’ve connected both ends of the hose, use your adjustable wrench to give each connection a final tighten. But be careful not to over-tighten as this could damage the threads.
- Check for Leaks: After you’ve connected the bidet hose, check for any potential leaks. If you notice any water dripping, tighten the connection a bit more until the leak stops.
Here are the steps to open the water valve and check for leaks when installing a Bio Bidet 6800, as per the instructions on the Bio Bidet website:
- Open the Water Valve: After connecting the bidet to the water supply, slowly open the water valve. Make sure to do this slowly to prevent any sudden pressure build-up.
- Check for Leaks: Once the water valve is open, check all the connections for any leaks.
This includes the connection at the water supply, the T-adapter, and the connection to the bidet.
If you find any leaks, close the water valve, disconnect the leaking part, and check the washers.
If the washers are in good condition, reconnect the part and make sure it’s tight.
If the washers are damaged, they may need to be replaced.
Remember, it’s important to check for leaks before using the bidet to prevent any water damage.
If you’re unsure about any part of the installation process, it may be best to hire a professional plumber to ensure the bidet is installed correctly.
Please note that these instructions are a general guide and may not cover every possible situation or challenge you might encounter during installation.
Always refer to the specific installation instructions provided with your Bio Bidet 6800 and don’t hesitate to reach out to Bio Bidet’s customer service if you need further assistance.
Plugging in and Testing the Bio Bidet 6800
Alright,
We’re on the home stretch.
You’ve done an amazing job so far, and now it’s time to plug in and test your Bio Bidet 6800.
Exciting, isn’t it?
Let’s get to it!
First, locate the power cord on the side of the bidet seat and plug it into a nearby electrical outlet.
Make sure the outlet is a grounded (three-prong) one.
Safety first, right?
Now, turn on the water supply by rotating the handle of the T-valve.
Listen for the sound of water filling the bidet.
No leaks?
Great!
If you do spot a leak, turn off the water supply and check your connections.
Remember, it’s all about that snug fit!
Next, press the “”Power”” button on the remote control.
You should see the LED lights come on.
If not, double-check your power connection.
Now, for the moment of truth.
Press the “Rear” or “Front” wash button on the remote.
You should hear the wash nozzle extend and water start to spray.
If everything’s working as it should, give yourself a pat on the back.
You’ve successfully installed your Bio Bidet 6800!
But wait, there’s more!
The Bio Bidet 6800 isn’t just about basic functionality.
It’s about comfort and customization.
So, take some time to play around with the settings.
Adjust the water temperature, change the spray position, try out the different wash modes.
Make it your bidet experience.
And that’s it!
You’re now a bona fide bidet installer.
Final Say So!
Hey, DIY heroes, that’s a wrap!
With these easy-to-follow steps, your Bio Bidet 6800 should be ready for action, and you can give yourself a high-five for a job well done.
No fuss, no mess, and no calling the plumber!
So go ahead, take a moment to revel in your home improvement triumph – you’ve earned it.
Keep on rockin’ those household projects, because with guides like this, you’re unstoppable!
Happy spritzing, friends! 🚽💧
FAQs
How do you use a Bio Bidet USPA 6800?
Using the Bio Bidet USPA 6800 is simple. Just take a seat and use the remote control to adjust the water pressure and temperature to your preference. Select the desired wash mode and enjoy a comfortable and hygienic experience.
How to install bio bidet BB 600?
Installing the Bio Bidet BB 600 is a straightforward process. Follow the included installation guide, connect the water supply, attach the bidet seat to the toilet, plug it into an electrical outlet, and it’s ready to use.
Can I self install bidet?
Yes, many bidets are designed for self-installation. Basic plumbing skills and following the manufacturer’s instructions are usually sufficient for a successful installation. However, it may be wise to consult a plumber if unsure.
What is the water pressure for the USPA 6800?
The water pressure for the USPA 6800 can be adjusted according to your preference. It generally ranges from a gentle wash to a more robust spray, meeting various comfort levels.
How do you activate a bidet?
To activate a bidet, simply press the wash button on the bidet’s control panel or remote. Depending on the model, you may have options to adjust the water pressure, temperature, and spray type.
How do you install a bidet filter?
Installing a bidet filter typically involves connecting it to the bidet’s water inlet hose. Unscrew the hose, attach the filter, and reconnect everything. Make sure to follow the specific instructions provided with your filter.
How do you install a bidet on a modern toilet?
Installing a bidet on a modern toilet usually involves removing the existing toilet seat, attaching the bidet’s mounting plate, connecting the water supply, and securing the bidet seat. Most come with comprehensive instructions for DIY installation.
How do you attach a bidet to a sink?
Attaching a bidet to a sink may require a T-adapter to split the water supply between the sink and bidet. Connect the hoses, ensure tight seals, and follow the specific instructions of the bidet model you’re using.